扫码一下
查看教程更方便
大多数情况下,您的项目将包含图像、字体等资源。 在 webpack 4 中,为了处理这些静态资源,我们必须安装以下一种或多种加载器:file-loader、raw-loader 和 url-loader。
在这里,我们将使用一个带有图像的示例进行介绍。 让我们在 webpack.config.js 中添加新规则:
module: {
  rules: [
    ...
    {
      test: /\.(?:ico|gif|png|jpg|jpeg)$/i,
      type: 'asset/resource',
    },
  ]
},
在这里,type 字段使用 asset/resource 而不是 file-loader。
完整的配置文件如下
webpack.config.jsconst HtmlWebpackPlugin = require("html-webpack-plugin"); const path = require('path'); module.exports = { entry: { main: path.resolve(__dirname, './src/app.js'), }, output: { filename: '[name].bundle.js', path: path.resolve(__dirname, 'deploy') }, module: { rules: [ { test: /\.js$/, exclude: /node_modules/, use: { loader: 'babel-loader', options: { presets: ['@babel/preset-env'] } } }, { test: /\.css$/, use: ["style-loader", "css-loader"] }, { test: /\.(?:ico|gif|png|jpg|jpeg)$/i, type: 'asset/resource', }, ] }, plugins: [ new HtmlWebpackPlugin({ title: 'Webpack - 迹忆客(jiyik.com)', }) ], };
现在,为了测试加载器,我们将在 src 目录中创建一个 image-component.js 文件,其内容如下:
image-component.jsimport image from "./webpack.png"; const img = document.createElement("img"); img.src = image; document.body.appendChild(img);
在这里,我们将图像作为模块导入并使用它来创建 <img/> 标签。 要使上述代码能有效的执行,需要下载图像,然后将其重命名为 webpack.png 并将其放在 src 目录中。
接下来是在 app.js 中导入我们的图像组件:
import './image-component';
完整的入口文件内容如下
app.jsimport component from './component'; import './style.css'; import './image-component'; document.body.appendChild(component());
然后我们开始运行 webpack
$ npm run dev

> webpack-example@1.0.0 dev /Users/jiyik/workspace/js/webpack-example
> webpack --mode development

asset main.bundle.js 26.6 KiB [emitted] (name: main)
asset 878b668d5f6ca7808eb3.png 26.2 KiB [emitted] [immutable] [from: src/webpack.png] (auxiliary name: main)
asset index.html 257 bytes [compared for emit]
runtime modules 1.98 KiB 6 modules
javascript modules 10.1 KiB
  modules by path ./node_modules/ 8.08 KiB
    modules by path ./node_modules/style-loader/dist/runtime/*.js 5.75 KiB 6 modules
    modules by path ./node_modules/css-loader/dist/runtime/*.js 2.33 KiB
      ./node_modules/css-loader/dist/runtime/noSourceMaps.js 64 bytes [built] [code generated]
      ./node_modules/css-loader/dist/runtime/api.js 2.27 KiB [built] [code generated]
  modules by path ./src/ 2.02 KiB
    modules by path ./src/*.js 475 bytes 3 modules
    modules by path ./src/*.css 1.55 KiB
      ./src/style.css 1.11 KiB [built] [code generated]
      ./node_modules/css-loader/dist/cjs.js!./src/style.css 452 bytes [built] [code generated]
./src/webpack.png 42 bytes (javascript) 26.2 KiB (asset) [built] [code generated]
webpack 5.54.0 compiled successfully in 1116 ms
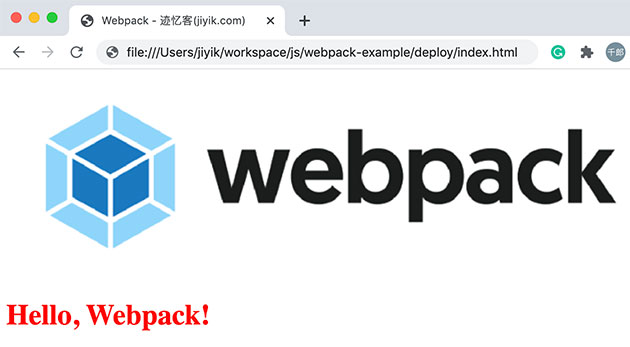
然后在浏览器中打开 dist/index.html 文件,可以看到图片被加载到页面中。

如果您现在查看 deploy 文件夹,您会发现其中生成了三个文件:878b668d5f6ca7808eb3.png、main.bundle.js 和 index.js。 以下是 webpack 所做的:将图像添加到 deploy 文件夹并分配一个唯一的哈希值,然后是图像扩展名。 然后该图像作为模块包含在新生成的 main.bundle.js 文件中。 最后,引用 main.bundle.js 文件生成一个 index.html 文件。
