在 Angular 中提供文件下载
无知的幸福是当你想要下载一个文件时,你登录到一个网站,搜索文件,找到它,点击下载,然后你就完成了,而不知道在那个网站上提供这些文件以供下载的背后的任务和努力 地点。 对于 Web 开发人员来说,提供文件下载可能是一项让您羡慕这些无辜用户的任务。
但是我们如何使用 Angular 框架提供文件供下载呢? 让我们考虑一些方法。
使用 Angular 提供 .txt 文件以供下载
这里的第一种方法是将文本转换为 .txt 格式并提供下载。 要提供文件下载,我们需要使用 blob,这是一种用于直接向浏览器提供文档的虚拟存储。
首先要做的是启动一个新的 Angular 项目。 然后在 app.component.html 文件中,我们将输入以下代码:
代码片段- app.component.html :
<a [href]="fileUrl" download="file.txt">DownloadFile</a>
这将创建网页结构和将被单击以进行下载的链接。
然后我们需要为应用程序创建功能和行为。 我们将在 app.component.ts 文件中执行此操作,如下所示:
代码片段- app.component.ts:
import { Component } from '@angular/core';
import { DomSanitizer } from '@angular/platform-browser';

@Component({
  selector: 'app-root',
  templateUrl: './app.component.html',
  styleUrls: ['./app.component.css']
})
export class AppComponent {
  title = 'done';
  fileUrl;
  constructor(private sanitizer: DomSanitizer) {  }
  ngOnInit() {
    const data = 'some text';
    const blob = new Blob([data], { type: 'application/octet-stream' });
    this.fileUrl = this.sanitizer.bypassSecurityTrustResourceUrl(window.URL.createObjectURL(blob));
  }
}
我们首先定义我们希望保存的数据; 它是一个文本,一些文本。 然后我们定义 Blob 函数并在函数内部声明我们要保存的数据。
我们将使用 DomSanitizer 模块来使我们提供下载的文件能够通过 Angular 的安全测试。 然后我们转到 app.module.ts 文件以导入我们用于创建应用程序的模块。
代码片段- app.module.ts:
import { NgModule } from '@angular/core';
import { BrowserModule } from '@angular/platform-browser';
import { FormsModule } from '@angular/forms';
import { AppRoutingModule } from './app-routing.module';
import { AppComponent } from './app.component';

@NgModule({
  declarations: [
    AppComponent
  ],
  imports: [
    BrowserModule,
    AppRoutingModule,
    FormsModule
  ],
  providers: [],
  bootstrap: [AppComponent]
})
export class AppModule { }
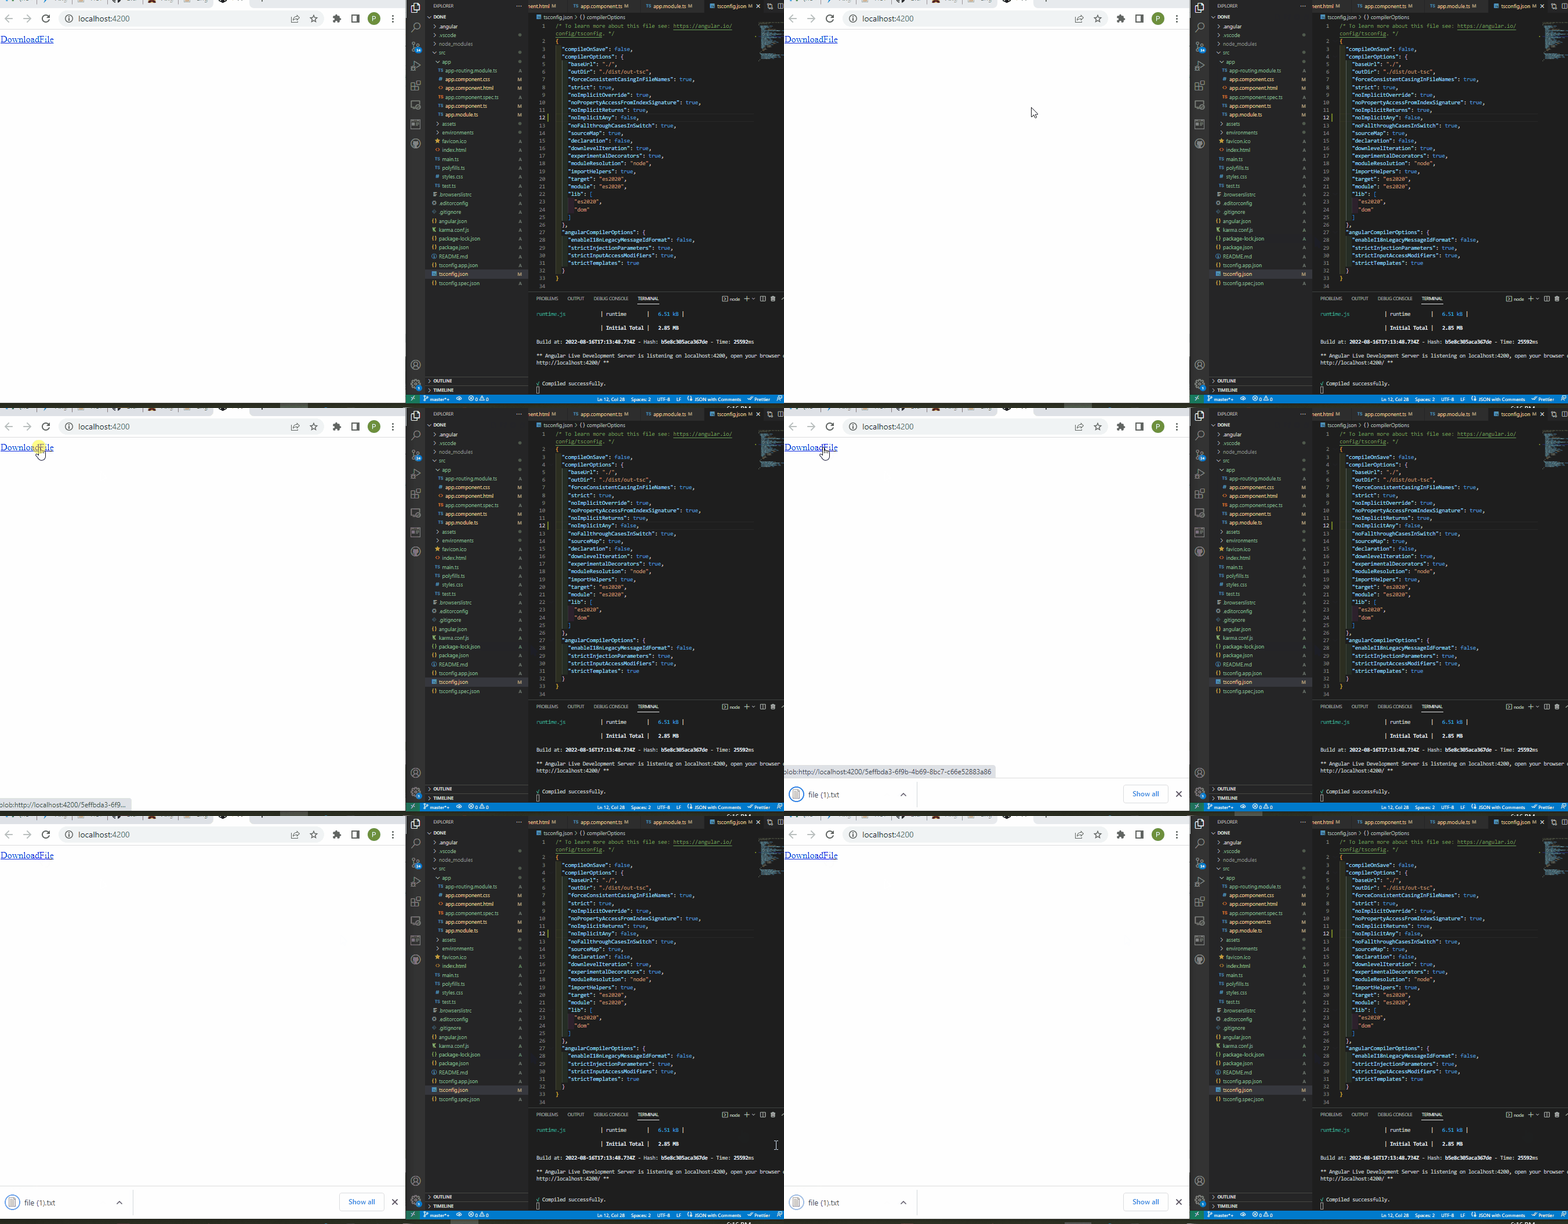
输出:

使用 ngx-filesaver 提供下载文件
现在让我们看看如何使用 Angular 中的 ngx 依赖项来提供文件以供下载。 ngx-filesaver 是一个安全且流行的包,它提供了一种简单的方法来提供文件以供下载。
可以通过在新创建的项目文件夹的目录中键入 npm i ngx-filesaver 来安装 ngx-filesaver。
接下来,我们将导航到 app.component.html 文件并编写这些代码来创建 Web 应用程序的结构。
代码片段- app.component.html:
<h1></h1>
<textarea [(ngModel)]="text"></textarea>
<button type="button" (click)="onDown()">Save Text</button>
在这里,我们创建了一个带有 onDown 事件侦听器的按钮,以便在单击该按钮时下载我们提供的文件。
现在我们必须在 app.component.ts 文件中做真正的工作,如下所示:
代码片段- app.component.ts:
import { Component, OnInit } from '@angular/core';
import { HttpClient } from '@angular/common/http';
import { FileSaverService } from 'ngx-filesaver';

@Component({
  selector: 'app-root',
  templateUrl: './app.component.html',
  styleUrls: ['./app.component.css']
})

export class AppComponent implements OnInit{
  title = 'loginfive';
  public text = 'hello';
  constructor(
    private _httpClient: HttpClient,
    private _FileSaverService: FileSaverService
  ) {}

  ngOnInit() {}

  onDown() {
    const fileName = `save.txt`;
    const fileType = this._FileSaverService.genType(fileName);
    const txtBlob = new Blob([this.text], { type: fileType });
    this._FileSaverService.save(txtBlob, fileName);
    }
}
您会注意到在 app.component.ts 文件中,我们在按钮标签内声明了 onDown 事件侦听器。 在这里,我们为它定义了函数。
首先,我们声明了将提供下载的数据; 这是一个文本文件。 然后我们利用 blob 提供文件以在浏览器上下载。
这种方法的最后一部分是导入我们用于开发网络应用程序的模块。
代码片段- app.module.ts:
import { NgModule } from '@angular/core';
import { BrowserModule } from '@angular/platform-browser';
import { FormsModule } from '@angular/forms';
import { HttpClientModule } from '@angular/common/http';
import { FileSaverModule } from 'ngx-filesaver';
import { AppComponent } from './app.component';

@NgModule({
  imports:      [ BrowserModule,
    FormsModule,
    HttpClientModule,
    FileSaverModule ],
  declarations: [ AppComponent ],
  bootstrap:    [ AppComponent ]
})
export class AppModule { }
输出:

使用 Angular 提供 .jpg 文件以供下载
到目前为止,我们一直在研究如何提供 .txt 文件以供下载。 现在让我们看看如何提供图片以供下载。
我们将从一个 URL 中获取图片,下载将显示一个由 Angular Material 提供的进度条。
我们应该首先创建一个新的 Angular 项目并安装 Angular Material 包,导航到项目文件夹并键入:ng add @*angular/material 。
安装成功后,我们将转到 app.component.html 文件来创建页面结构以包含下载进度幻灯片。
代码片段- app.component.html:
<mat-card>
    <div class="file">
        <p>{{ slides.name }}</p>
        <button (click)="download(slides)" mat-raised-button color="primary">Download</button>
    </div>
    <mat-progress-bar *ngIf="download$ | async as download"
        [mode]="download.state == 'PENDING' ? 'buffer' : 'determinate'"
    [value]="download.progress">
    </mat-progress-bar>
</mat-card>
我们需要创建一个组件,我们将在其中处理代码以观察下载进度,激活材料幻灯片。 我们将创建一个文件,将其命名为 download.ts,并在其中运行这些代码。
代码片段 - download.ts:
import {
    HttpEvent,
    HttpEventType,
    HttpProgressEvent,
    HttpResponse
  } from "@angular/common/http";
  import { Observable } from "rxjs";
  import { distinctUntilChanged, scan, map, tap } from "rxjs/operators";

  function isHttpResponse<T>(event: HttpEvent<T>): event is HttpResponse<T> {
    return event.type === HttpEventType.Response;
  }

  function isHttpProgressEvent(
    event: HttpEvent<unknown>
  ): event is HttpProgressEvent {
    return (
      event.type === HttpEventType.DownloadProgress ||
      event.type === HttpEventType.UploadProgress
    );
  }

  export interface Download {
    content: Blob | any;
    progress: number;
    state: "PENDING" | "IN_PROGRESS" | "DONE";
  }

  export function download(
    saver?: (b: Blob) => void
  ): (source: Observable<HttpEvent<Blob>>) => Observable<Download> {
    return (source: Observable<HttpEvent<Blob>>) =>
      source.pipe(
        scan(
          (download: Download, event): Download => {
            if (isHttpProgressEvent(event)) {
              return {
                progress: event.total
                  ? Math.round((100 * event.loaded) / event.total)
                  : download.progress,
                state: "IN_PROGRESS",
                content: null
              };
            }
            if (isHttpResponse(event)) {
              if (saver) {
                saver(event.body);
              }
              return {
                progress: 100,
                state: "DONE",
                content: event.body
              };
            }
            return download;
          },
          { state: "PENDING", progress: 0, content: null }
        ),
        distinctUntilChanged((a, b) => a.state === b.state
          && a.progress === b.progress
          && a.content === b.content
        )
      );
  }
由于我们需要观察我们为下载服务的文件的下载进度,所以我们使用 Observable 函数来监测下载进度,然后将其转化为素材滑块。 接下来是创建一个服务文件,该文件将处理从 URL 中获取的文件,然后将其与进度幻灯片一起显示。
让我们创建一个服务文件,将其命名为 download.service.ts,并键入以下代码:
代码片段 - download.service.ts:
import { Injectable, Inject } from '@angular/core'
import { HttpClient, HttpRequest } from '@angular/common/http'
import { download, Download } from './download'
import { map } from 'rxjs/operators'
import { Observable } from 'rxjs'
import { SAVER, Saver } from './saver.provider'

@Injectable({providedIn: 'root'})
export class DownloadService {

  constructor(
    private http: HttpClient,
    @Inject(SAVER) private save: Saver
  ) {
  }

  download(url: string, filename?: string): Observable<Download> {
    return this.http.get(url, {
      reportProgress: true,
      observe: 'events',
      responseType: 'blob'
    }).pipe(download(blob => this.save(blob, filename)))
  }

  blob(url: string, filename?: string): Observable<Blob> {
    return this.http.get(url, {
      responseType: 'blob'
    })
  }
}
为了向我们的应用程序提供这些服务,我们需要一个提供者,创建一个新文件,将其命名为 saver.provider.ts,并将代码放入其中。
代码片段- saver.provider.ts:
import {InjectionToken} from '@angular/core'
import { saveAs } from 'file-saver';

export type Saver = (blob: Blob, filename?: string) => void
export const SAVER = new InjectionToken<Saver>('saver')
export function getSaver(): Saver {
  return saveAs;
}
接下来是获取我们要提供下载的图片的 URL。 我们将在 app.component.ts 文件中执行此操作并键入这些代码。
代码片段- app.component.ts:
import { Component, Inject } from '@angular/core';
import { DownloadService } from './download.service'
import { Download } from './download'
import { Observable } from 'rxjs'
import { tap } from 'rxjs/operators'
import { DOCUMENT } from '@angular/common'

@Component({
  selector: 'app-root',
  templateUrl: './app.component.html',
  styleUrls: ['./app.component.css']
})
export class AppComponent {
  title = 'done';
  slides =
    {name: 'Click here:', url: 'https://cdn.pixabay.com/photo/2015/04/23/22/00/tree-736885_960_720.jpg'}
  download$: Observable<Download>

  constructor(private downloads: DownloadService,
              @Inject(DOCUMENT) private document: Document) {}

  download({name, url}: {name: string, url: string}) {
    this.download$ = this.downloads.download(url, name)
  }
}
我们需要大量的模块来运行应用程序。 我们需要将这些模块导入到 app.module.ts 文件中。
代码片段- app.module.ts:
import { NgModule } from '@angular/core';
import { BrowserModule } from '@angular/platform-browser';
import { FormsModule } from '@angular/forms';
import { HttpClientModule } from '@angular/common/http'
import {MatButtonModule} from '@angular/material/button';
import {MatProgressBarModule} from '@angular/material/progress-bar';
import {MatCardModule} from '@angular/material/card';
import { BrowserAnimationsModule} from '@angular/platform-browser/animations'
import { AppComponent } from './app.component';
import { SAVER, getSaver } from './saver.provider'

@NgModule({
  imports:      [
    BrowserModule,
    FormsModule,
    BrowserAnimationsModule,
    HttpClientModule,
    MatButtonModule,
    MatProgressBarModule,
    MatCardModule
  ],
  providers: [{provide: SAVER, useFactory: getSaver}],
  declarations: [ AppComponent ],
  bootstrap:    [ AppComponent ]
})
export class AppModule { }
然后我们需要用一些样式来美化页面。 我们将在 app.component.css 文件中添加这个小片段。
代码片段 - app.component.css:
mat-card {
    display: flex;
    flex-direction: column;
  }

  .file {
    display: flex;
    justify-content: space-between;
    align-items: center;
  }
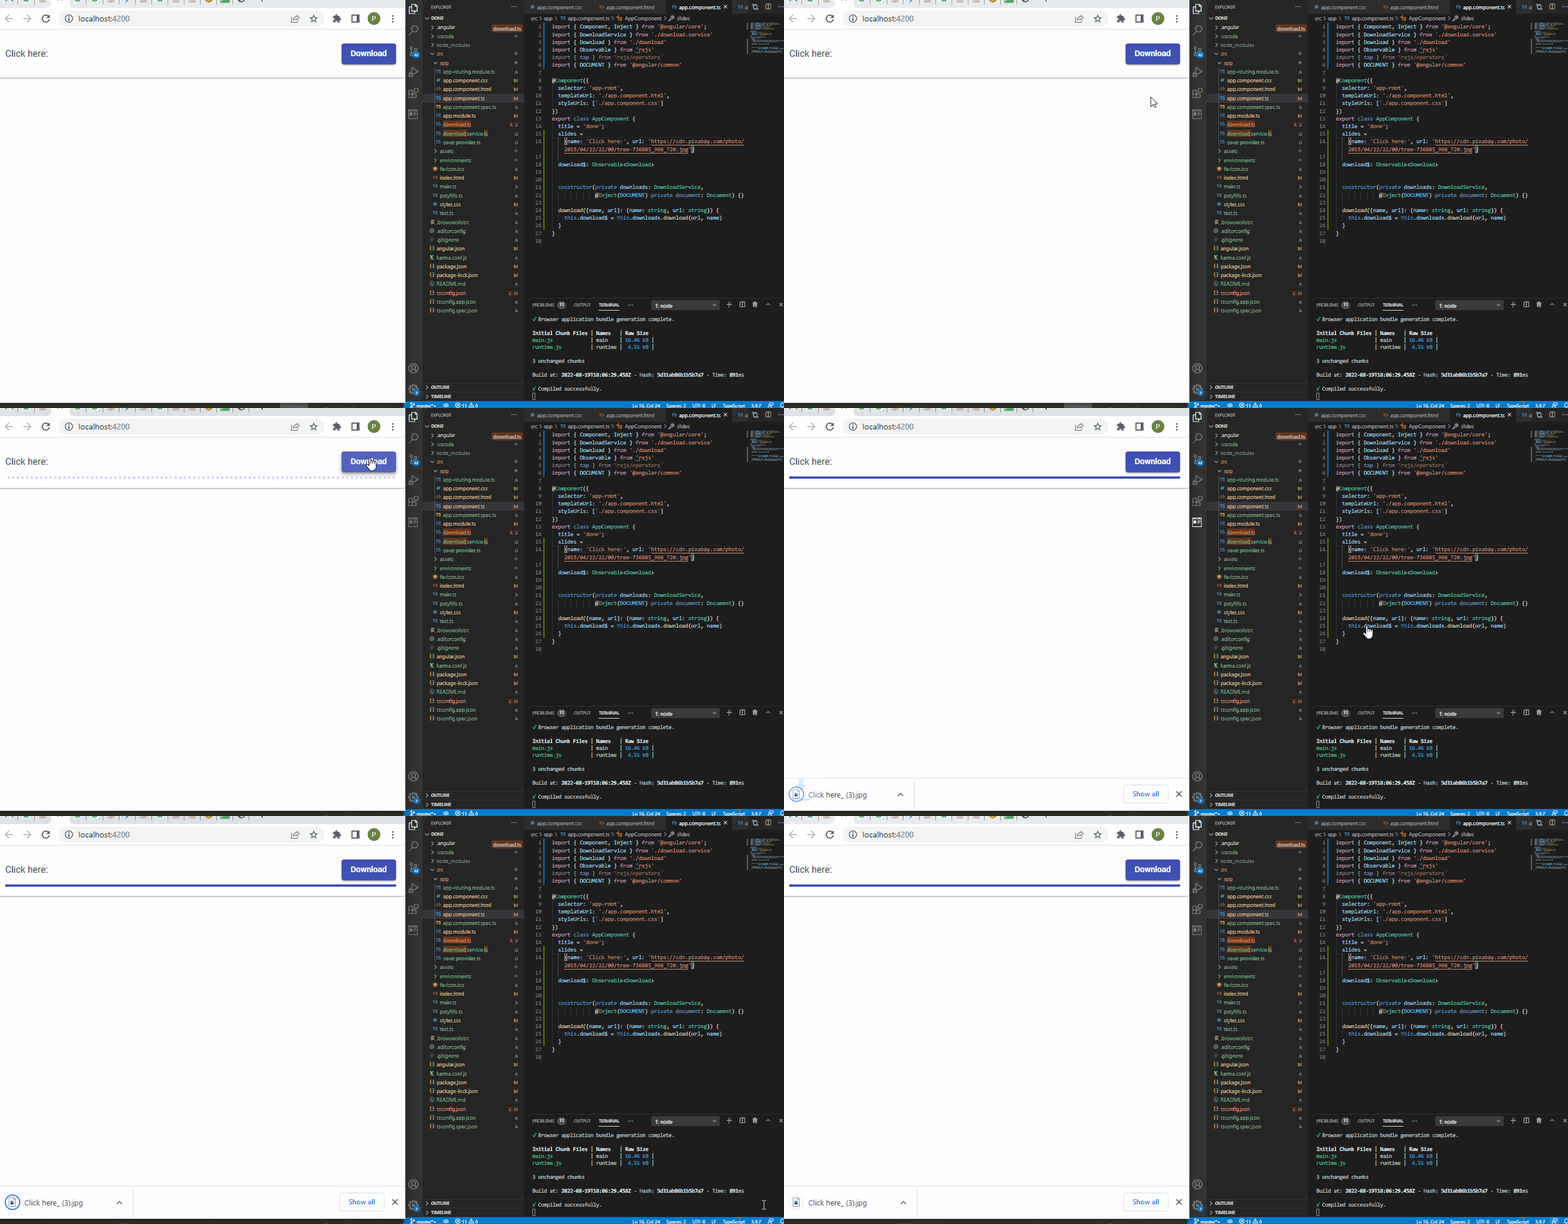
输出:

总结
根据我们想要提供下载的文件,我们可以采用多种方法在我们的 Angular 应用程序中实现这一点,使用 Angular blob 来保存文件。
相关文章
Do you understand JavaScript closures?
发布时间:2025/02/21 浏览次数:108 分类:JavaScript
-
The function of a closure can be inferred from its name, suggesting that it is related to the concept of scope. A closure itself is a core concept in JavaScript, and being a core concept, it is naturally also a difficult one.
Do you know about the hidden traps in variables in JavaScript?
发布时间:2025/02/21 浏览次数:178 分类:JavaScript
-
Whether you're just starting to learn JavaScript or have been using it for a long time, I believe you'll encounter some traps related to JavaScript variable scope. The goal is to identify these traps before you fall into them, in order to av
How much do you know about the Prototype Chain?
发布时间:2025/02/21 浏览次数:150 分类:JavaScript
-
The prototype chain can be considered one of the core features of JavaScript, and certainly one of its more challenging aspects. If you've learned other object-oriented programming languages, you may find it somewhat confusing when you start
用 jQuery 检查复选框是否被选中
发布时间:2024/03/24 浏览次数:102 分类:JavaScript
-
在本教程中学习 jQuery 检查复选框是否被选中的所有很酷的方法。我们展示了使用直接 DOM 操作、提取 JavaScript 属性的 jQuery 方法以及使用 jQuery 选择器的不同方法。你还将找到许多有用的
jQuery 中的 Window.onload 与 $(document).ready
发布时间:2024/03/24 浏览次数:180 分类:JavaScript
-
本教程演示了如何在 jQuery 中使用 Window.onload 和 $(document).ready 事件。

