Install WordPress with Nginx on Ubuntu 18.04
WordPress is one of the most popular open source content management systems (CMS) with a market share of up to 60% compared to other CMS like Drupal or Joomla. WordPress can be used to develop any type of website, be it a blog, a small business, or a large enterprise. With its free and premium plugins and themes, a WordPress website can be quickly extended to provide advanced functionality. Custom themes and plugins can also be developed from scratch to embed unique features to any WordPress website. In this article, we will cover the installation of WordPress CMS using the LEMP stack, i.e. NGINX as a web server in Ubuntu 18.04.
Prerequisites
- We can open an SSH session in Ubuntu 18.04 server using root or a sudo enabled user.
- A registered domain name or subdomain pointing to your WordPress installation.
- A DNS A record for your domain pointing to your server's IP address.
This tutorial requires the use of domain names. Whenever we see SUBDOMAIN, , DOMAINor TLDvariables, replace them with your own domain name values.
Update your Ubuntu 18.04
Before starting to install NGINX, it is always recommended to upgrade Ubuntu 18.04 to the latest version. The following apt-getcommand will do it for us.
$ apt-get update
$ apt-get upgrade
The first command will update the list of available packages and their versions and the second command will actually install the newer version of the packages we have. Once the system upgrade is complete, check the release version of your Ubuntu system using the following command.
$ lsb_release -a
No LSB modules are available.
Distributor ID: Ubuntu
Description:    Ubuntu 18.04.2 LTS
Release:        18.04
Codename:       bionic
Installing WordPress with NGINX on Ubuntu
Follow the steps below to install WordPress with NGINX on Ubuntu server.
Step 1: Install NGINX
NGINX is available in the default repositories of Ubuntu and can be installed using a single line command as shown below.
$ apt-get install nginx
For a more detailed nginx installation tutorial, you can refer to our " How to install Nginx on Ubuntu 20.04? "
Step 2: Install MariaDB
MariaDB is available in the default repositories of Ubuntu. It can also be installed from a separate MariaDB repository. But we will stick to installing it from the default repositories of Ubuntu. Use the following command from the terminal to install it and we can optionally run mysql_secure_installationto make it safe.
$ apt-get install mariadb-server
$ systemctl enable mariadb.service
$ mysql_secure_installation
The default password for the MariaDB root user is blank. To update the password for the root user, get the MySQL prompt and update the password by issuing the following commands from the MySQL shell.
$ mysql -u root -p
MariaDB [(none)]> use mysql;
MariaDB [mysql]> update user SET PASSWORD=PASSWORD("Passw0rd!") WHERE USER='root';
MariaDB has been installed in Ubuntu 18.04 system. Now proceed to install PHP in the next step.
Step 3: Install PHP
The latest version of PHP (7.2) is available in the repositories of Ubuntu 18.04 and is the default installation candidate, so just run the following command in your terminal to install it.
$ apt-get install php7.2 php7.2-cli php7.2-fpm php7.2-mysql php7.2-json php7.2-opcache php7.2-mbstring php7.2-xml php7.2-gd php7.2-curl
In addition to installing php7.2, the command above apt-getalso installs a few other packages as well as the MySQL, XML, Curl, and GD packages, and ensures that our WordPress site can interact with the database, supports XMLRPC, and can also crop and automatically resize images. In addition, NGINX requires the php-fpm (Fast Process Manager) package to handle the PHP pages of the WordPress installation. Remember that once PHP is installed, the FPM service will automatically run.
Step 4: Create a WordPress database
After installing and configuring MariaDB in your server, create a user and a database specifically for WordPress installation. To do this, mysql -u root -plog in to the MariaDB server using the command and complete the steps described below.
$ mysql -u root -p
Enter password:

MariaDB [mysql]> CREATE DATABASE wordpress_db;
Query OK, 1 row affected (0.00 sec)

MariaDB [mysql]> GRANT ALL ON wordpress_db.* TO 'wpuser'@'localhost' IDENTIFIED BY 'Passw0rd!' WITH GRANT OPTION;
Query OK, 0 rows affected (0.00 sec)

MariaDB [mysql]> FLUSH PRIVILEGES;
Query OK, 0 rows affected (0.00 sec)

MariaDB [mysql]> exit
Don't panic because there is no command to create the "wpuser" database user. It will be created automatically using the GRANT command above. I learned this recently and thought it would come as a surprise to anyone reading this tutorial. :)
Step 5. Configure NGINX for WordPress
Now let's move on to configuring the NGINX server block to serve our WordPress domain. First, create the root folder for our WordPress installation.
$ mkdir -p /var/www/html/wordpress/public_html
To create the NGINX server block for our WordPress domain, go to the /etc/nginx/sites-available folder. This is the default location for the NGINX server block. Create a configuration file for the NGINX server block using your favorite editor and edit it as shown below.
$ cd /etc/nginx/sites-available
$ cat wordpress.conf
The content is as follows
server {
            listen 80;
            root /var/www/html/wordpress/public_html;
            index index.php index.html;
            server_name SUBDOMAIN.DOMAIN.TLD;

        access_log /var/log/nginx/SUBDOMAIN.access.log;
            error_log /var/log/nginx/SUBDOMAIN.error.log;

            location / {
                         try_files $uri $uri/ =404;
            }

            location ~ \.php$ {
                         include snippets/fastcgi-php.conf;
                         fastcgi_pass unix:/run/php/php7.2-fpm.sock;
            }

            location ~ /\.ht {
                         deny all;
            }

            location = /favicon.ico {
                         log_not_found off;
                         access_log off;
            }

            location = /robots.txt {
                         allow all;
                         log_not_found off;
                         access_log off;
           }

            location ~* \.(js|css|png|jpg|jpeg|gif|ico)$ {
                         expires max;
                         log_not_found off;
           }
}
Use the following command to check the correctness of the above configuration file:
$ nginx -t
nginx: the configuration file /etc/nginx/nginx.conf syntax is ok
nginx: configuration file /etc/nginx/nginx.conf test is successful
To activate the Server block, create a symbolic link to the above configuration file in the /etc/nginx/sites-enabled folder.
$ cd /etc/nginx/sites-enabled
$ ln -s ../sites-available/wordpress.conf .
Reload NGINX to apply the new WordPress domain settings.
$ systemctl reload nginx
Step 6. Download and configure WordPress
In this step, download the archived WordPress files using wget and extract them to the root directory of the WordPress installation we created in the previous step. To complete it, run the following command from the terminal.
$ cd /var/www/html/wordpress/public_html
$ wget https://wordpress.org/latest.tar.gz
$ tar -zxvf latest.tar.gz
$ mv wordpress/* .
$ rm -rf wordpress
Change ownership and apply correct permissions to the extracted WordPress files and folders. To do this, use the following command from the terminal.
$ cd /var/www/html/wordpress/public_html
$ chown -R www-data:www-data *
$ chmod -R 755 *
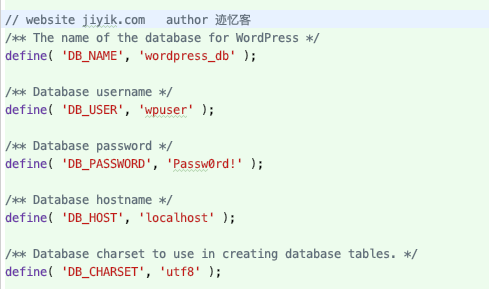
Now provide the database name, database user, and password in the WordPress configuration file so that it can connect to the MariaDB database we created earlier. By default, WordPress provides a sample configuration file which we will use to create our own. To do this, first, rename the sample WordPress configuration file to wp-config.php and edit it using your own favorite editor.
$ cd /var/www/html/wordpress/public_html
$ mv wp-config-sample.php wp-config.php
$ vi wp-config.php
Some of the content is as follows
 ...
 ...
 define('DB_NAME', 'wordpress_db');
 define('DB_USER', 'wpuser');
 define('DB_PASSWORD', 'Passw0rd!');
 ...
 ...
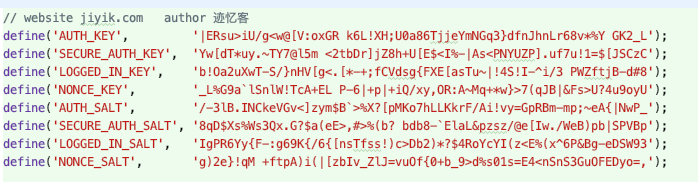
To protect your WordPress site, please add the security key in the above WordPress configuration file, just after the database configuration options, generate it via this link .
We are now ready to install our WordPress site using your favorite browser.
Step 7: Install WordPress
To complete the WordPress installation, point our favorite web browser to SUBDOMAIN.DOMAIN.TLDand follow the steps as described below
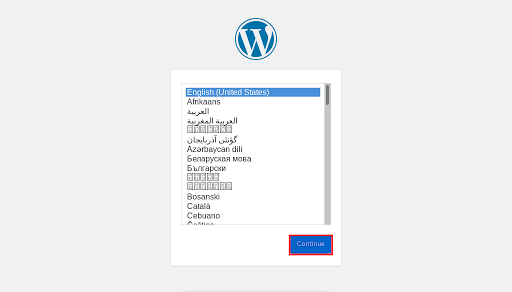
The installer will prompt us to select a language. Select a language and click Continue.
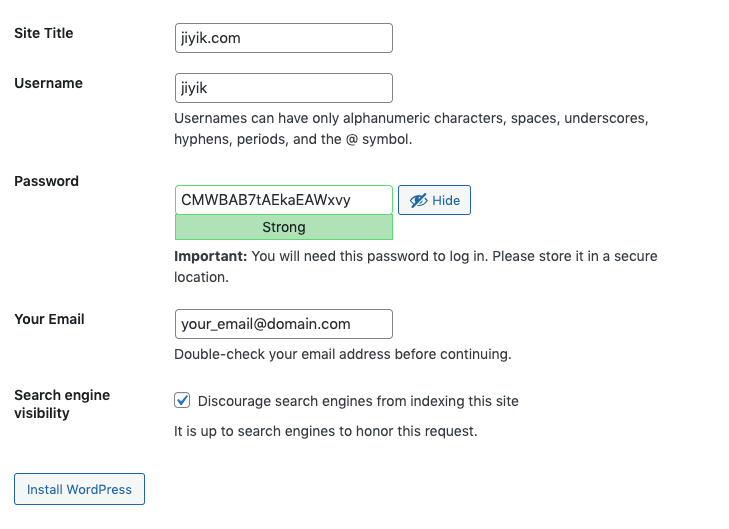
Now provide the site information like site title, username, password, email and click on the Install WordPress button.
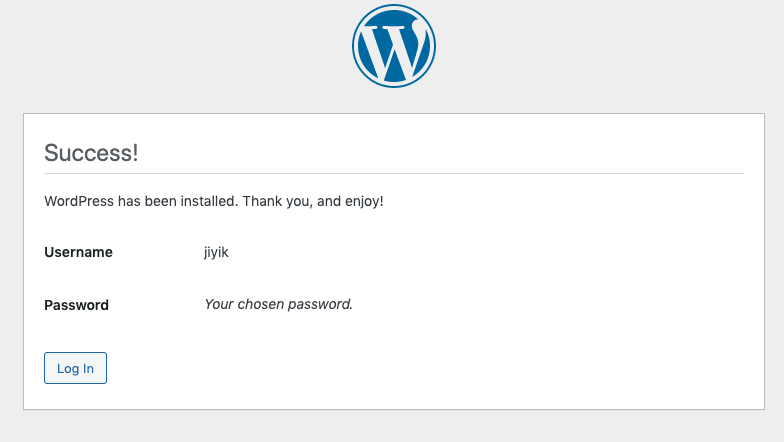
We have finished installing our WordPress website. Click Log In to log into the control panel and continue configuring plugins and themes for our site.
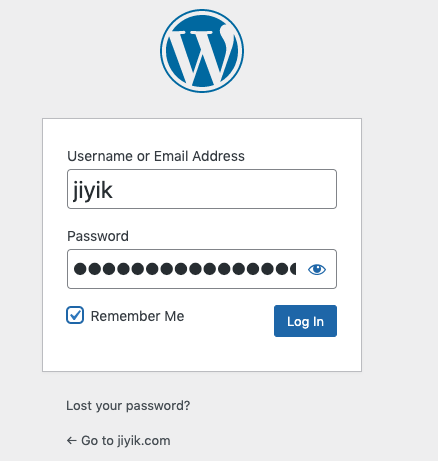
Provide the username and password we entered earlier for the first login.
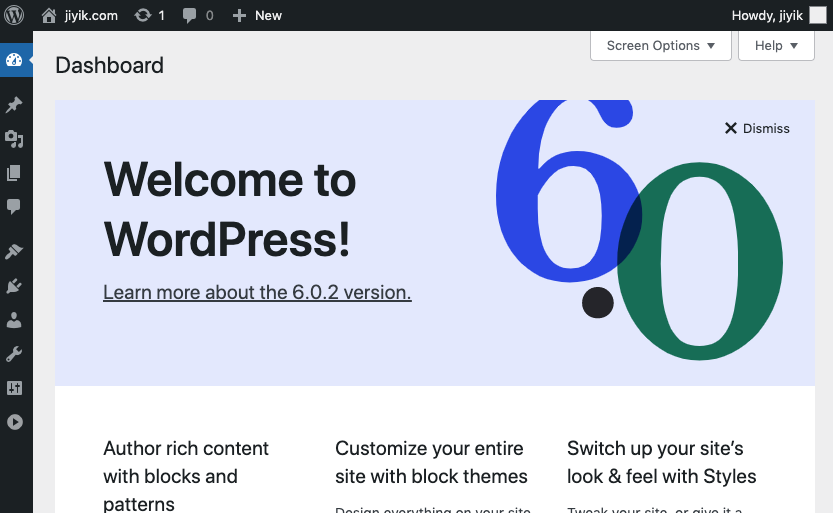
Congratulations! Your WordPress website is installed and ready to be customized according to your requirements.
In this example, click jiyik.com in the upper left corner to jump to the website page

Summarize
WordPress is the most popular CMS, and we have learned how to install it with NGINX on an Ubuntu server. Now we can move on to creating our own website using it.
For reprinting, please send an email to 1244347461@qq.com for approval. After obtaining the author's consent, kindly include the source as a link.
Related Articles
How to Install Nginx on Ubuntu 20.04?
Publish Date:2025/04/07 Views:157 Category:OPERATING SYSTEM
-
Nginx is one of the most popular web servers in the world, responsible for hosting some of the largest and most trafficked sites on the Internet. It is a lightweight application software that can be used as a web server or a reverse proxy.
How to use Let's Encrypt with Nginx to configure https in Ubuntu 20.04
Publish Date:2025/04/07 Views:123 Category:OPERATING SYSTEM
-
Let's Encrypt is a Certificate Authority (CA) that provides an easy way to obtain and install free TLS/SSL certificates, enabling encrypted HTTPS on your web server. It simplifies the process by providing a software client, Certbot, which a
Solution to incorrect access log time when deploying Nginx in Docker
Publish Date:2025/03/26 Views:165 Category:Docker
-
In the process of operating the website, I never took the logs too seriously. Although logging was turned on, I never analyzed the logs carefully. Today, when I looked at the logs on a whim, I found that the recorded time was 8 hours less t
Docker deploys nginx php application
Publish Date:2025/03/26 Views:131 Category:Docker
-
I'm learning docker recently. I'm learning by building an nginx+php development environment example. Here I record the build process. First, give a docker-compose.yml deployment configuration file version: '3' services: nginx: container_nam
Nginx load balancing settings
Publish Date:2025/03/18 Views:198 Category:NETWORK
-
At this stage, load balancing is a widely used technology. Nginx, as a load balancing server for http, is being used more and more widely. There are three ways to set up Nginx load balancing: Round-robin - This method distributes access req
Nginx load balancing health_check analysis
Publish Date:2025/03/18 Views:56 Category:NETWORK
-
In Nginx load balancing, it is difficult to guarantee that every application server can run normally all the time. However, we can set Nginx to detect these application servers and detect which of them are inaccessible. There are two ways t
HTTP2 Tutorial - How to Configure HTTP2 with Nginx
Publish Date:2025/03/17 Views:195 Category:NETWORK
-
HTTP2 was officially released in 2015. If your website is still using HTTP/1.1, you may be out of date. Don't worry, here we will see how to use Nginx to upgrade your website to HTTP2. Install Nginx I feel that this column is redundant. Sin
Deep understanding of Nginx's server block selection algorithm
Publish Date:2025/03/17 Views:98 Category:NETWORK
-
Nginx is one of the most popular web servers in the world. It can successfully handle high loads with many concurrent client connections and can be used as a web server, mail server, or reverse proxy server. In this article, we will discuss
In-depth understanding of Nginx Location block matching algorithm
Publish Date:2025/03/17 Views:65 Category:NETWORK
-
Similar to the process that Nginx uses to select the Server block that will handle a request , Nginx also has an established algorithm to decide which Location block within a Server block to use to handle a request. location block syntax

